
Installing The Nailer®
Tools You Will Need
+ Staple gun or Screw Gun for HDPE Nailer
+ Screw Gun for Metal Nailer
+ “Tek” component screws or drywall screws
Steps To Install Drywall using The Nailer®
Installing The Nailer® on ceilings and walls is faster and easier than using wood blocking.
- Identify any interior wall and ceiling corners. (Do NOT install wood lath catcher or blocking).
- Starting at one end of the wall, fasten The Nailer® above every stud, up to 24″ on the center.
- See diagrams below for specific material instructions.
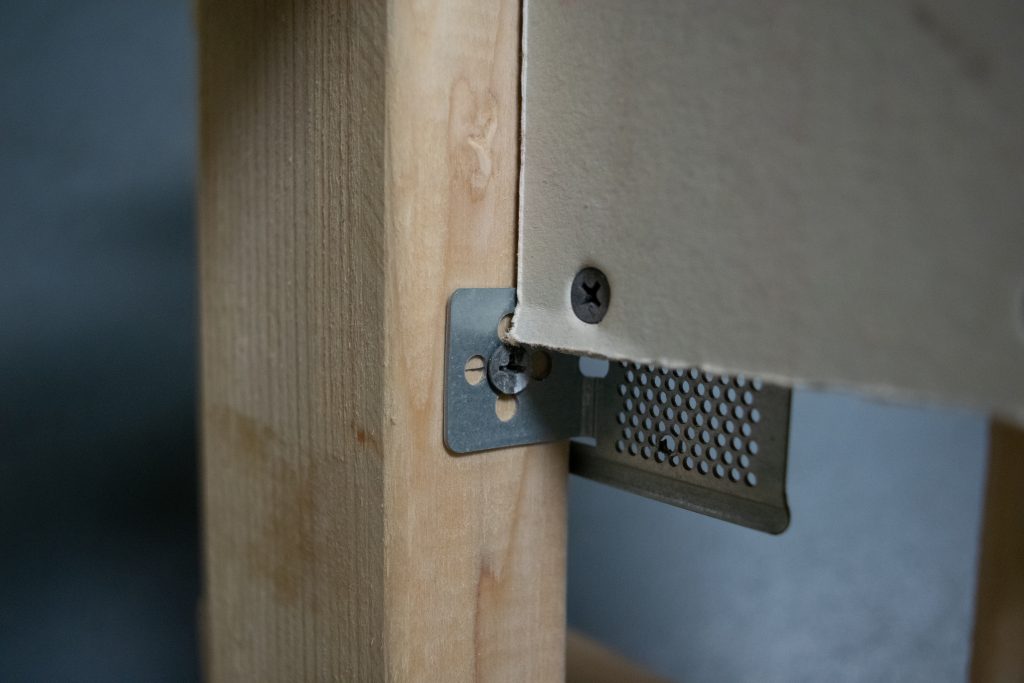
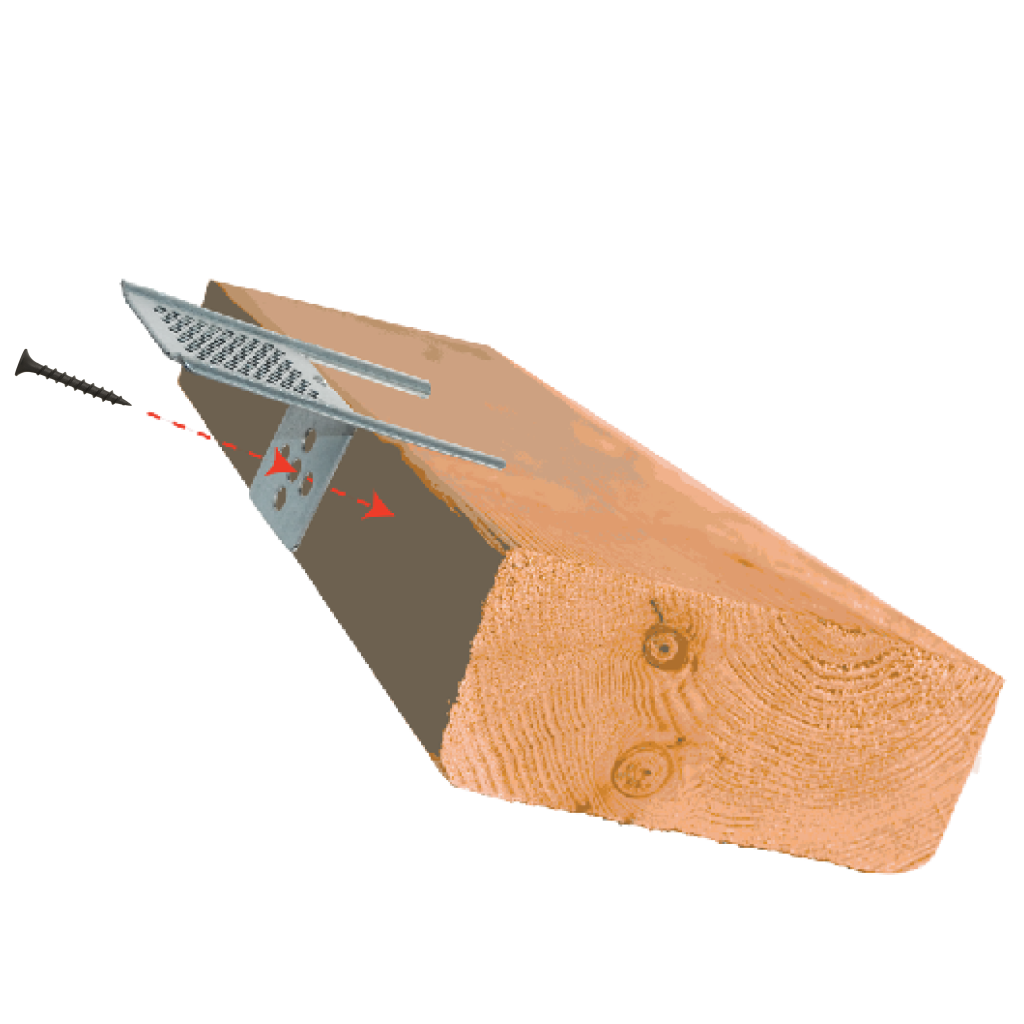
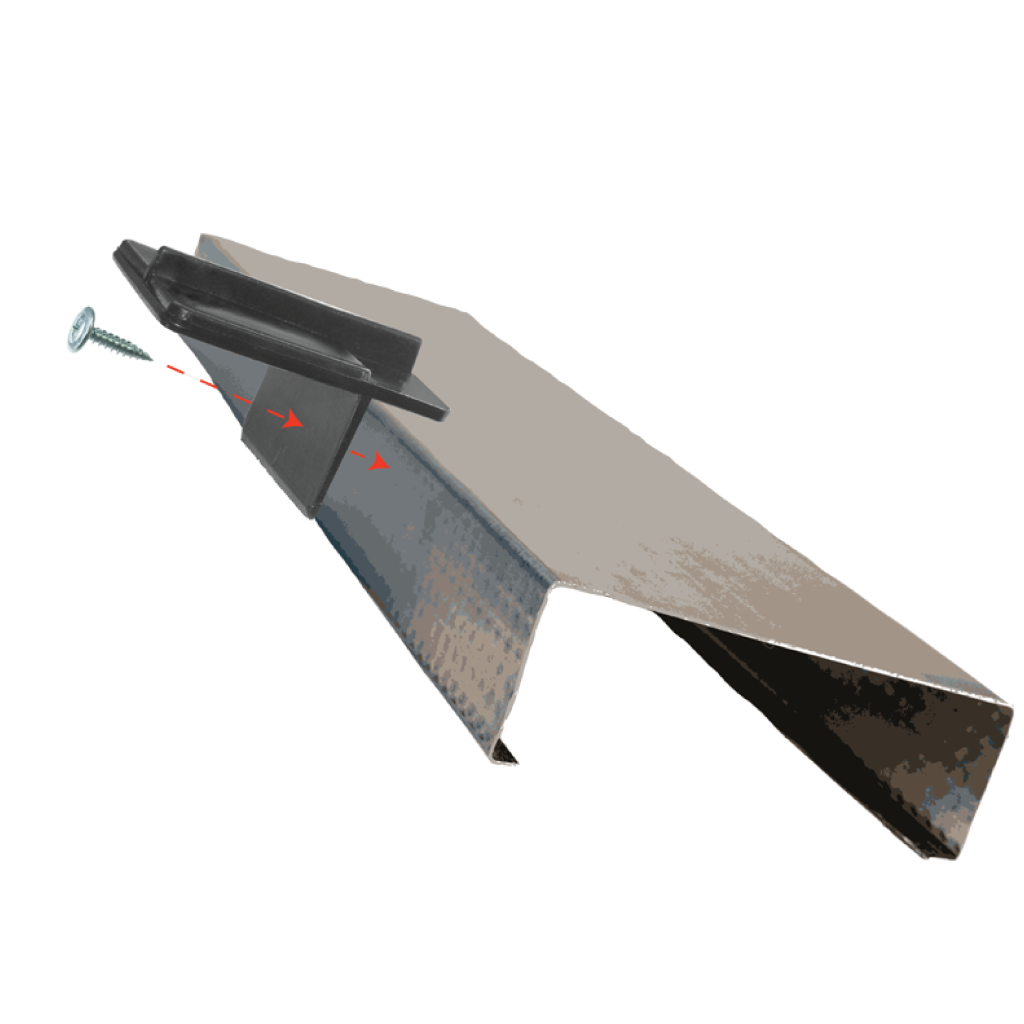
Fastening Metal Nailer To Wood
The Nailers® are attached to the end stud on the bisecting walls or top plate 16″ on the center. When fastening the galvanized steel Nailer to a wood framing member, use one 1-1/4″ – #6 or #8 course threaded drywall screw.
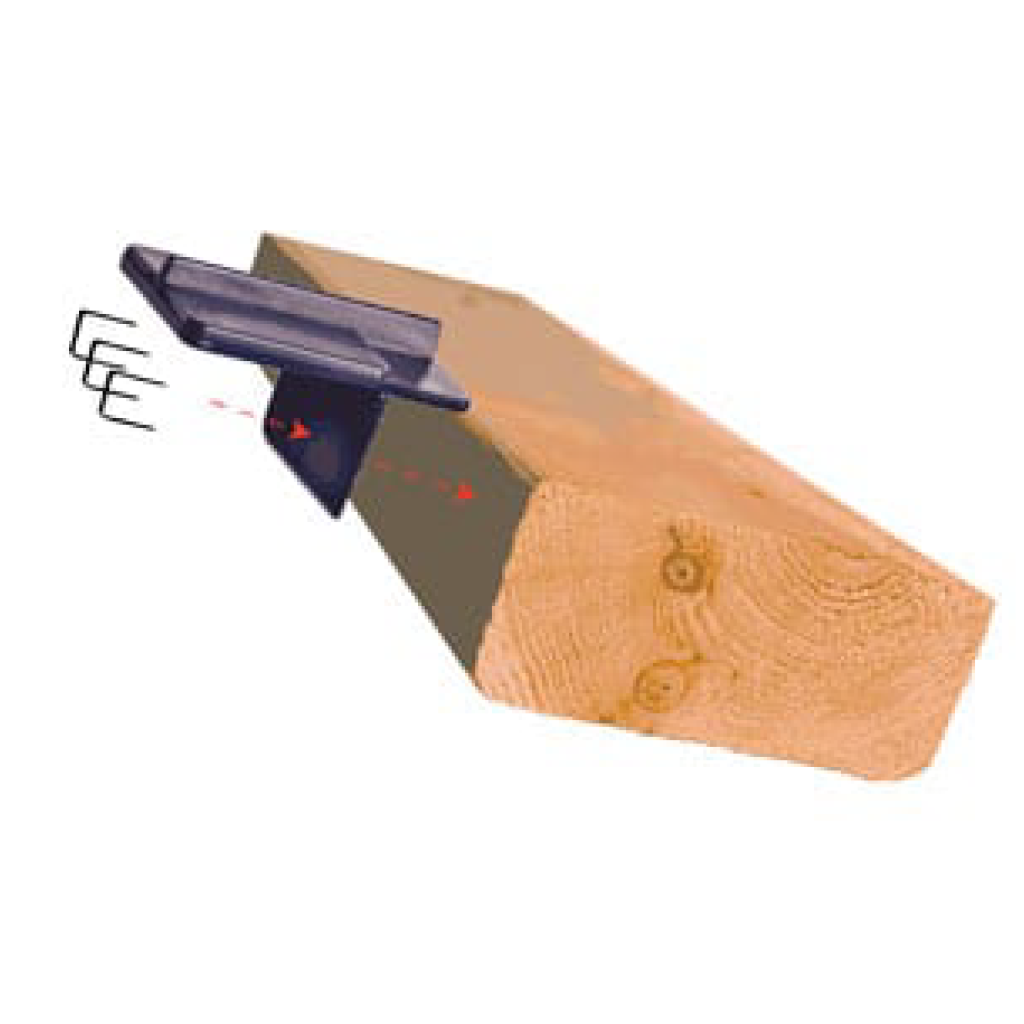
Fastening Plastic Nailer To Wood
When fastening the HDPE Nailer® to a wood framing member, use two 1/2″ staples (min.) with a 1/2″ crown from an Arrow T-150 staple gun (i.e.) or the like. The staples will go through the down stem of The Nailer®.
Fastening Metal Nailer To Metal
When fastening the galvanized steel Nailer to a metal framing member, use a “Tek” or component screw. The recommended placement of the screw in the galvanized Nailer is the center hole of the backing plate.
Fastening Plastic Nailer To Metal
When fastening the HDPE plastic Nailer® to a metal framing member, use a “Tek” or component screw. The screw will go through the down stem of The Nailer®.
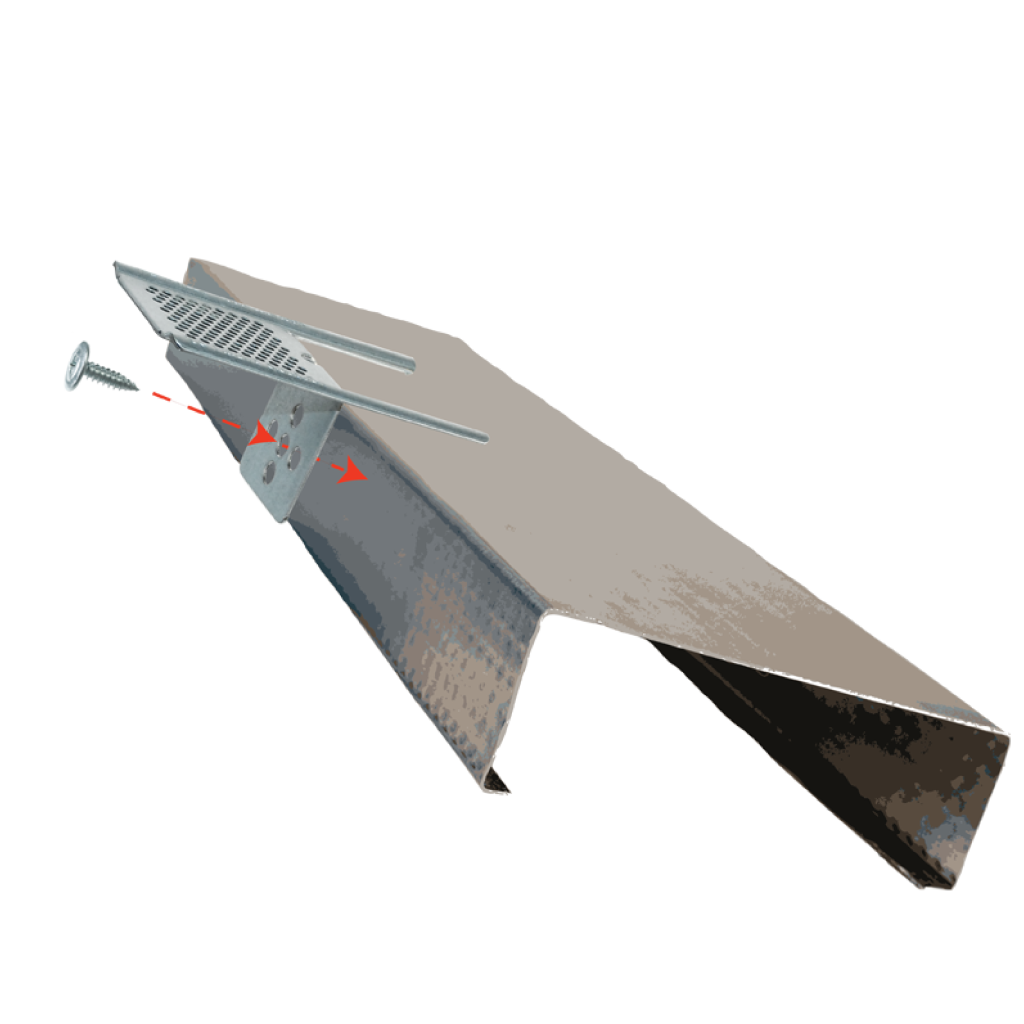
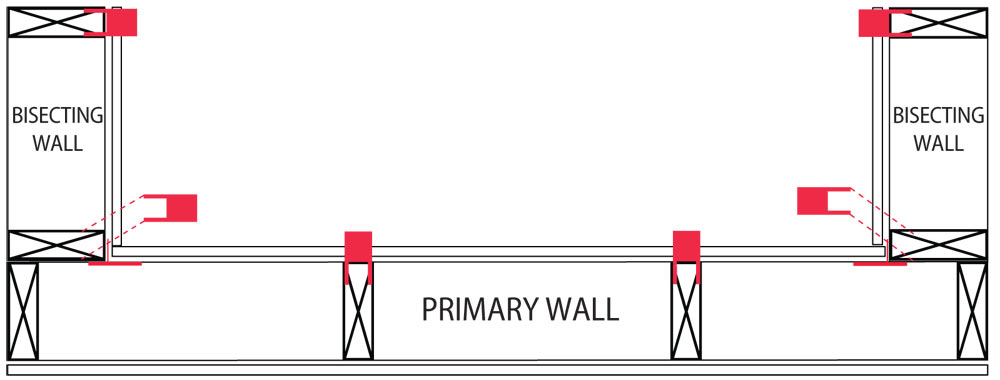
Ceiling-To-Wall Application
The Nailer® is installed 16″ on the center from the top plate in the wall-to-wall application. Adding the lid’s thickness to measurement, i.e., 48- 5/8″, will allow both sheets to fasten to The Nailer® at the seam.
Installation FAQs
How Many Nailers Do I Need?
By placing The Nailers® sixteen inches in the center and using them in the ceiling and the walls, it has been estimated that you will use 150 to 200 Nailers per 1000 sq. ft. of living space.
What Is Used To Fasten The Nailer® To The Framing?
If you are using the plastic Nailer®, you can nail, screw or use a staple gun into drywall and framing. Not all contractors use air guns, so we have made it possible to install The Nailer using the most common tools, such as a hand staple gun. If you use the metal Nailer®, you fasten it to the drywall and the framing with a screw gun. This is true for both wood and metal framing. Use standard drywall or “Tek” screw.
Does The Nailer® Attach Drywall To Studs?
Yes – by attaching The Nailer® to the wood or metal framing, you can then hang the drywall on both the walls and ceiling and connect it to The Nailer® as well as you can fasten the drywall directly to The Nailer® adjacent to the down-stem.
May I Use The Nailer® On Metal Studs?
Yes. Fasten The Nailer® to both wooden and metal studs and framing with one steel component screw or “Tek” screw. Fasten your drywall clips through the down stem with the beveled edge. This product has been designed and engineered, so you will never have to go up on top or back behind a wall to put in the backing.
Must I Use Three Half-Inch Staples To Fasten The Nailer® To The Framing?
The rule of two or three half-inch staples only applies to hand staple guns because that is usually the longest staple that can penetrate The Nailer® and still go in all the way. It was this greatest common denominator in which The Nailer® was tested. However, it is ideal when using pneumatic guns to install The Nailer® and use the broadest crown staple like a shingle staple or a nail with a flat head like a drywall nail or roofing nail. Be sure that the penetration is one inch or greater. Under these conditions, it is only necessary to use one staple or nail.
Can The Nailer® Be Used To Help Prevent Cracking Due To Truss Uplift?
Yes. By placing The Nailer® on the top plate to one side of each truss, then fasten your drywall in the corner to The Nailer®, not the truss. The subsequent screw placement should be a minimum of sixteen inches from the corner. If a truss is running parallel to a wall and is six inches or closer to the wall, do not fasten to that truss. Skipping the truss will allow the drywall to arch, and the corner will remain intact when the truss moves in different climates.